Building a Luxeon Star caselight
Originally published 2002 in Atomic: Maximum Power ComputingLast modified 03-Dec-2011.
As those who read my original caselight piece will already know, Light Emitting Diodes (LEDs) have a lot going for them if you want zero-maintenance, long-life, high-efficiency, cheery-coloured lighting for your funkalicious window-sided computer.
The problem with using regular high intensity LEDs for case lighting, though, is that you need an array of them to get an impressive amount of light. A fair amount of soldering is thus involved.
Fortunately, LEDs are getting much, much brighter, thanks to new super-high-power designs like Lumileds' Luxeon Stars.
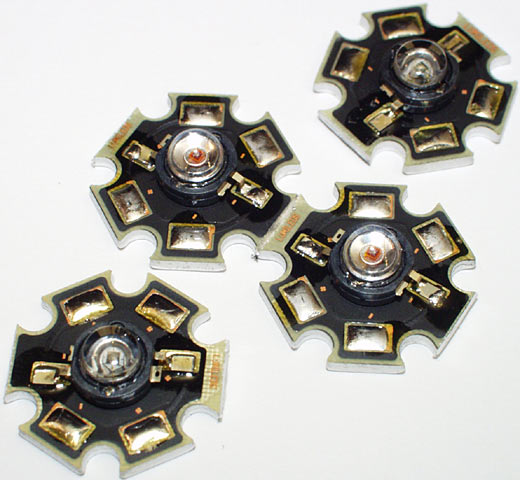
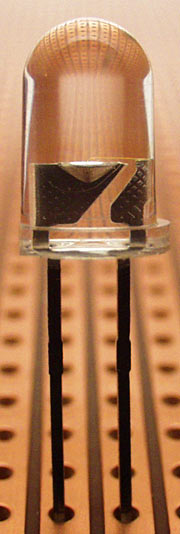
Luxeon Stars don't look like normal LEDs. They've got a much bigger light-emitting die...
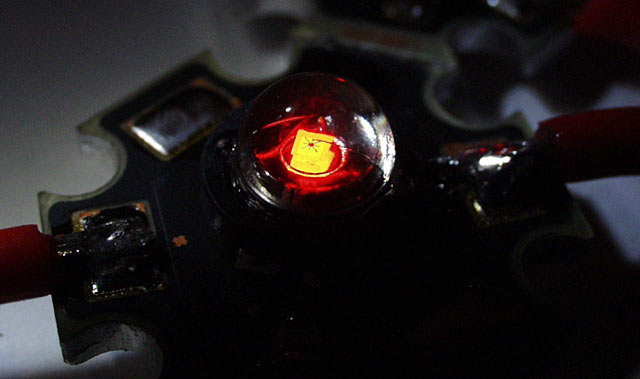
...which, here, is running from a mere trickle of power, so that it doesn't overexpose.

They have a much higher power rating to go with their enlarged dies. Even these first-generation Stars have a rated power up around one watt, versus about 0.1 watts for high power 5mm LEDs...
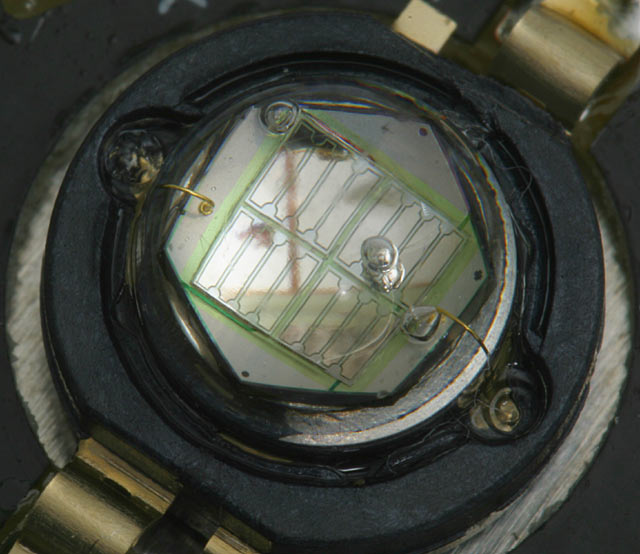
...and this is the light-emitting "die" of one of the newer five watt Luxeons, now known as the "V Star". It's four regular Star dies in one package.
If you actually want to use a 5W Luxeon at full power then you'll need to run it from about 7 volts, and attach it to a decently solid heat sink. No LED is perfectly efficient, and they can't tolerate anything like the operating temperature of an incandescent globe of similar power, so you have to keep them cool. But you can get a couple of watts out of a 5W Luxeon with very little trouble...
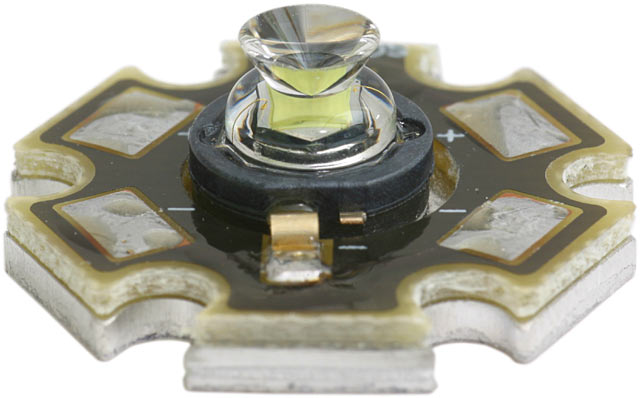
...and they come in peculiar variants, like this "side emitter" version, which throws light out the edges of its inverted-cone pseudo-lens.
As well as giving you at least ten LEDs worth of brightness in one unit, Luxeon Stars are also easier to work with. Unless you buy the LED-only "Emitter" version, you'll get your Star on a little circuit board with four handy solder pads for connections. It's thus easy to make arrays, if you want to. The boards also have metal backs, ready for heat sink mounting; at one watt or less, the metal back by itself is likely to keep the LED acceptably cool.
The Stars pictured above aren't the "Star/O" variants, with focussing optics (you can see some of those in my LED light roundup here); they're wide-angle units, ideal for close range lighting. Lumileds kindly provided me with blue, green and "red-orange" Stars for this project; the red-orange LEDs emit light further up the spectrum than normal red LEDs, which makes them appear brighter, while still definitely red.
Electrically speaking, Luxeon Stars work the same way as normal LEDs. They're just beefier. You still need a series resistor to hold off thermal runaway, and you still have to connect them the right way around or they won't do anything. I deal with all this in detail in the first caselight piece; all of the equations work the same way.
If you want to hook up one Star as a stand-alone caselight, it's dead easy to do it. A bit of fiddling revealed that you'll get the full rated 300 milliamp (mA) current through a green or blue one watt Star with about six ohms of in-line resistance, if your supply is five volts.
Even the red-orange Stars aren't nearly as visible as green or blue (human eyesight sees green as being brighter than any other colour, and blue is closer to green than red is), so I tried two red-oranges wired in parallel. They were happy from 5V at 600mA between them, with four ohms of in-line resistance.

Actually, first I tried them in series, like this, but then they needed more than five volts. So parallel it was.
If all you want is a caselight of one colour, a single one watt Star, or a couple of them in parallel or series, will do you nicely. One or two Luxeons, a power connector, an in-line resistor of appropriate specifications, some wire, and you're done. No array-soldering necessary. You don't even need an enclosure for the light, if you don't want one; insulate the bare solder pads and wire-ends (paint-on "liquid electrical tape" is good for this purpose) and you'll be fine.
Just making a wire with a light on the end isn't a very impressive project, though, so I built a fancier rig. Red-orange, green and blue Stars (two reds, one each of the other colours), separately controllable, with on/off switches and dimmer knobs.
Getting a good dimmer action for a high power LED is a bit tricky. The way to do it is to power the LED through a current limiting resistor, as usual, but also put a potentiometer ("pot"; variable resistor) in series. The pot should be linear (as opposed to logarithmic) resistance taper (more info here), and its maximum resistance value should be high enough to make the LED very dim, without being so high that you only get a worthwhile brightness change over part of the pot's action range. The pot also needs to have a high enough power rating that it won't be toasted by the maximum power it has to dissipate.
For single green or blue one watt Luxeon Stars being operated from five volts, a half-watt pot is plenty; its share of the total in-line resistance gives it only about 0.12 watts to dissipate, at most. Two red-orange Stars in parallel from 5V are more taxing, but the peak pot dissipation is still only about 0.36 watts. No problem, especially if the pot's mounted on a metal panel, or has a bit of air flow over it.
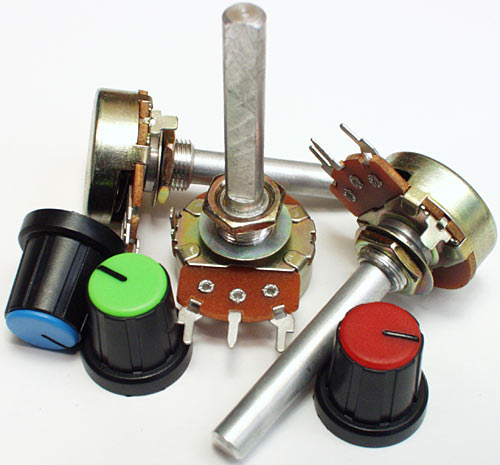
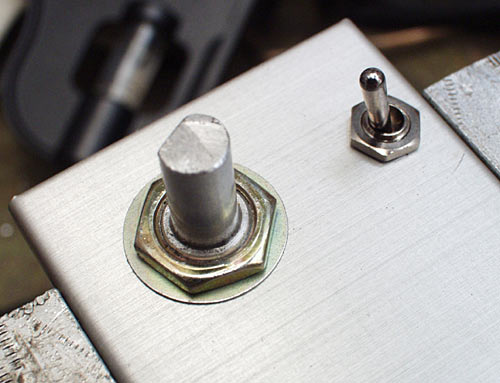
Potentiometers, and knobs to match, yours cheap from anywhere that sells electronic parts. Potentiometers come with long shafts, for flexibility of installation. If you're putting them right behind a panel - as you probably will be, if you make a light like this one - then you have to cut the shaft shorter, or your knobs will be out on stalks and look silly. The shafts are plain aluminium; a junior hacksaw's perfectly adequate for cutting them.
I used three 500 ohm 1/2 watt pots, which aren't ideal dimmers - LED efficiency isn't linear, so the dimmer action is a bit twitchy at the high brightness end - but which work well enough. And they cost only a couple of Australian bucks each from Jaycar.
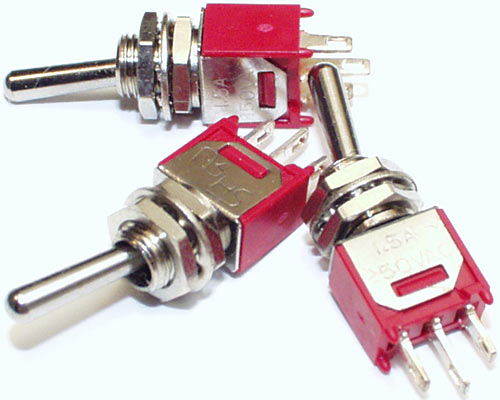
Plain single throw mini-switches are perfectly adequate for a task like this. If you need less than an amp of current handling - and for one or two Luxeons, that's all that flows - then there are tons of switches to choose from.
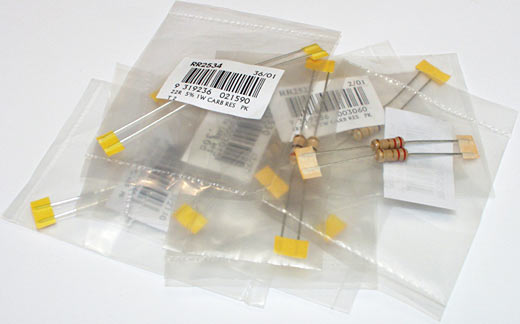
One watt low value resistors are fine for in-line use with Luxeon Stars running at not more than a watt each, from five volts. If you're using more Stars in a single array, or running them from 12 volts, then you'll need higher power resistors, or a lumpy cluster of one-watters.
I installed the pots and switches on a 5.25 inch bay cover for my Lian Li PC-60 case. These aluminium bay covers are easy to hack on; the plastic bay covers that most cases use are even easier. Where and how you install a mod like this, of course, is entirely your business, but bay covers are convenient, provided you've got a 5.25 inch bay free.
If you want to run a Luxeon Star at more than one watt - if you've got a five-watter, or if you're trying your luck and overdriving a one-watter - you'll need to give them a bit of cooling. Thermal-epoxy them to your case metalwork and they should be happy; if there's no metalwork available, consider separate heat sinks.
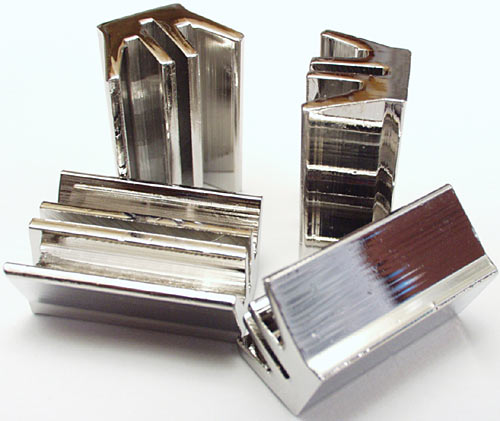
These are Tweakmonster RAMsinks, probably the finest you can buy. Made of copper, shiny-plated, and not much use at all for cooling RAM, simply because most RAM doesn't actually need much cooling (more raving on this subject here). The sinks sure make a nifty decoration, though, and they work well on the back of a Luxeon Star. They're sold in Australia by here in Australia by PC Case Gear.
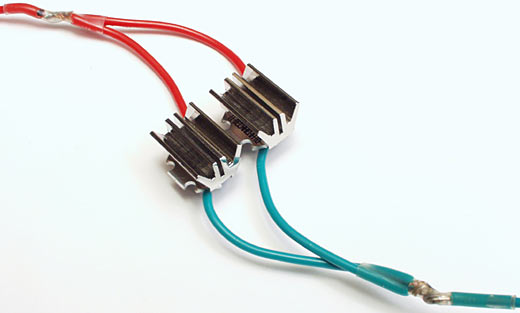
Heatsunk caselight, baby. Awww, yeah.
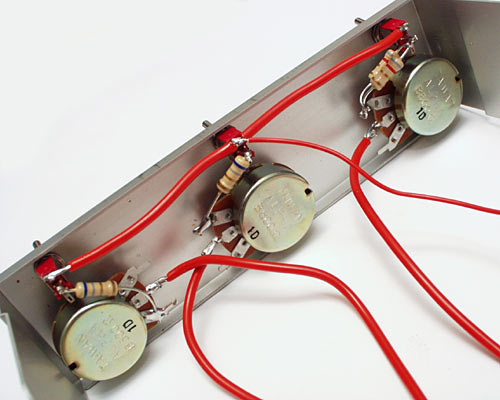
The back of the control panel, after all of the wires have been soldered but before all of the shiny connections get painted with liquid electrical tape (which, by the way, Jaycar have under catalogue numbers NM2832 and NM2834, for black and red respectively, at $AU27.95).
The circuit is simple enough. Five volts from the PSU - the thin red wire - goes to the top terminal of each switch. The middle terminal of each switch is connected via the limiting resistor(s) to the most clockwise terminal of each pot, as you look at them from underneath. The middle terminal of each pot is connected to the positive wire going to the relevant LED(s). The negative wires from the LEDs join together and connect to a PSU ground wire. That's it.
The three terminals on potentiometers let you wire them so their resistance goes up, or down, when you turn them in a given direction. In this case, for normal dimmer-type operation, you want them wired so that their resistance falls as you turn the spindle clockwise.
The limiting resistors are 6.8 ohm one watters for the blue and green LEDs, and a pair of 8.2 ohm one watt units in parallel for the two parallel red-orange Stars. These values, plus the roughly one ohm minimum resistance of the pots, and the extra fragment of an ohm from the rest of the circuit, keep these one watt Stars a bit below their maximum rated power.
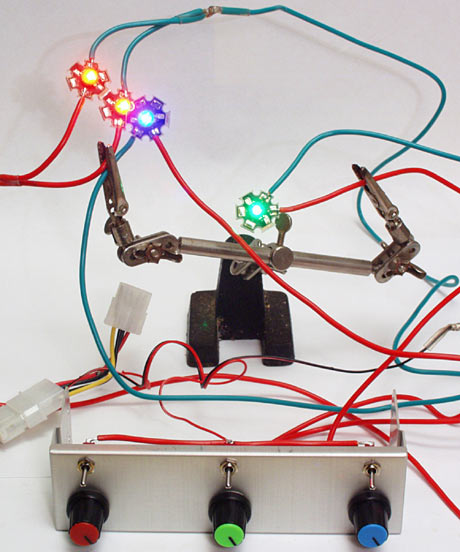
In operation, the whole rig consumes only about 900mA from a five volt supply, with everything on at full power. Run each colour separately at full power and the green and blue LEDs consume about 260mA each; the two reds consume 500mA between them. At this power level, the LEDs should be happy with unremarkable cooling. You could just mount them with double-sided tape inside your case.
Presto - infinitely variable case lighting to play with during those long, depressing respawn delays!
![]()
Click the film-strip picture for a big version.

![[SecureWebs]](images/sw.gif)