Vcam CU-68R and CU-99A webcams
Review date: 17 July 2001. Last modified 03-Dec-2011.
You can't judge a book by its cover, and you can't judge a webcam by its appearance. If you're looking for a USB PC video camera, there are umpteen options, most of which look pretty darn fabulous. Eggs, golf balls, phasers, visored helmets, simple boxes dressed up with superfluous bulges and fins. In all of this year's colours, darling.
Inside the snazzy cases, though, it's anybody's guess what sort of electronics you're getting. Most cheap webcams these days use none-too-expensive CMOS image sensors with pretty uninspiring image quality; better models have CCD image sensors. All of them are likely to have a pretty lousy lens, and the quality of the software bundles they come with varies as well.
Cameras that look great may stink. Cameras that look like just another face in the crowd may actually be terrific, for the money.
When I checked out a collection of Ezonics cameras lately (review here) I found that the cheapest but, if you ask me, nicest looking of them, the EZCam II USB, was actually appallingly bad. I still can't believe that the awful grey hazy images I got from it were normal, but I've had e-mails from a couple of other EZCam II users saying that theirs were just as broken. So I guess the one I saw wasn't just a one-off.
If you buy a name brand camera - something from Logitech or Creative - then you might not be getting absolutely the best feature-set possible for the money, but you're certainly not going to get a webcam with cataracts. So that's what a lot of people buy.
Most off-brand webcams have basic image quality as good as that from more expensive name brand units, though. You've just got to find a good one.
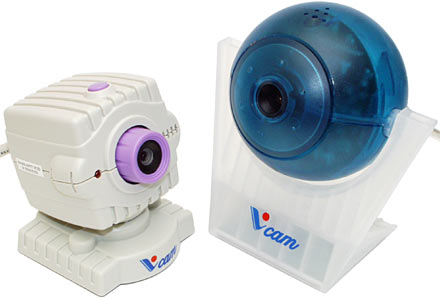
So here are a couple of "Vcam" cameras, from AME Optimedia Technology Co., Ltd, Taiwanese fabricators of bespoke USB camera hardware to the gentry. AME have a quite wide selection of cameras; I checked out their low-cost CU-68R and higher-spec CU-99A.
The 68R cost only $AU99 delivered from Aus PC Market (NOTE: This review's years old now, and Aus PC no longer sell these cameras), which puts it in the "budget" category. The 99A is only $AU148.50 delivered, which makes it pretty good value for a camera that can do 640 by 480.
Well, that's what the spec sheet says, anyway. I've learned not to take anything for granted. On with the show!
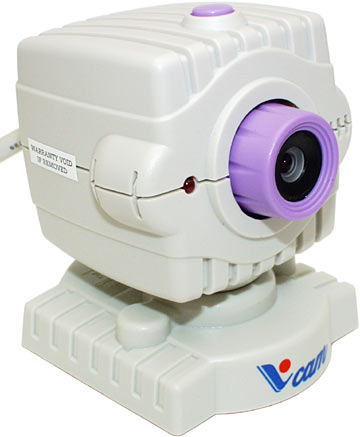
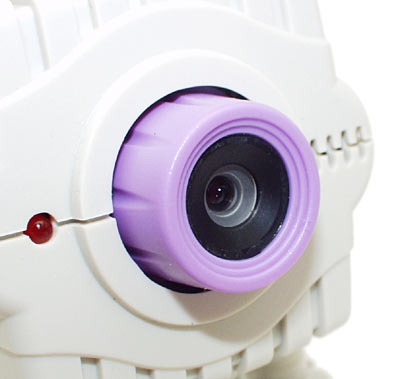
The CU-68R
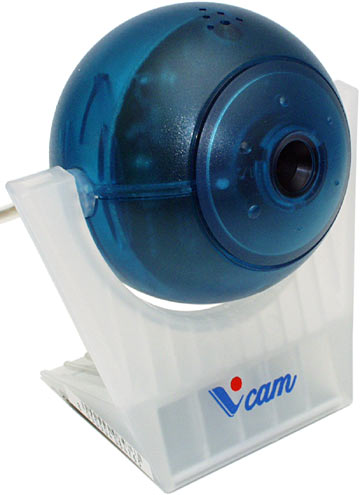
If you've had enough of see-through blue plastic peripherals, you won't like this camera much. Its spherical body's made of the usual Bondi Blue-ish stuff.
The 68R is unusually large for a ball-cam - the ball's about 65mm (2.5 inches) in diameter. It's hardly a giant, though, and its overall design's neat enough. It tilts on its forked stand, which has a metal plate in it for weight. There's a standard tripod mounting thread as well, which is tapped into the plate rather than just a plastic insert, like you get in most of the webcams that give you a tripod thread at all.
There are holes on the top of the 68R's ball to let sound in to a microphone, but this model of camera doesn't have one. It doesn't have a take-a-picture button on it, either; its "shutter" is entirely computer controlled.
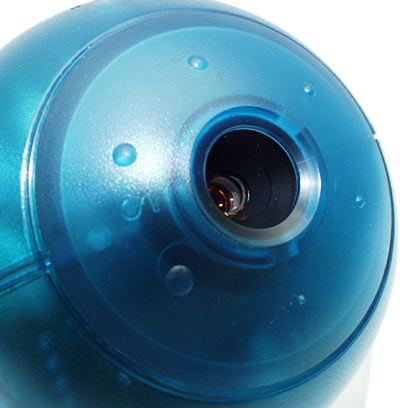
Most ball-cams have a protrusion for the lens. Not this one. To focus the lens, you turn a fair-sized section out of the front of the ball. The focus ring is a bit stiff, which is a problem exacerbated by the fact that you can't really grab it, so you've got to hold the camera still with one hand while you turn the front with the other. This isn't a huge annoyance, but it's a bit of a pain.
At least the focus stays put when you let it go, which is more than I can say for some cameras with loose lens assemblies.
The CU-68R has a CMOS image sensor with a maximum genuine output resolution of 352 by 288 pixels. That resolution's also known as Common Interchange Format, or CIF, and it's about the highest resolution used for desktop video-conferencing. Anything bigger gives you too lousy a frame rate over most Internet connections.
You can set the output resolution of the CU-68R however you like, but if you choose a resolution higher than CIF, the software will just interpolate in more pixels. So there's no point.
The CU-99A
The 99A's a more compact camera than the 68R. Its boxy beige body is only about 45mm square (1.75 inches).
Inside that body, you get a Sony CCD image sensor that's good for genuine 640 by 480 output. Which explains why this cameras' more expensive than the 68R. CCD sensors aren't, inherently, any higher resolution than CMOS ones, but they've got better sensitivity and, all things being equal, give a generally better picture at any resolution.
Like the 68R, the 99A has a case with a microphone grille, but there's no microphone behind it. There's actually a spot on the circuit board for one to be installed, but you don't get one on this model.
You do get a hardware take-a-picture button, though. This is a handy feature when you've got the camera out on the end of its cable for still photography purposes; you can peer at the computer screen as you adjust focus, then take the shot without having to do a Plastic Man impersonation.
As with the 68R, there's a steel plate in the bottom of the 99A's base, with a tripod thread tapped into it.
The 99A's lens surround is much more grabbable than the 68R's; it's still rather stiff, but you can turn it without having to hold the camera in place, and the stiffness makes fine focus adjustment easier, if you ask me. This camera feels like a quality product.
So does it take good pictures, or what?
Let's see, shall we?
Image quality
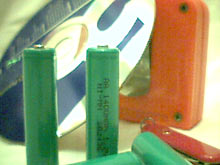
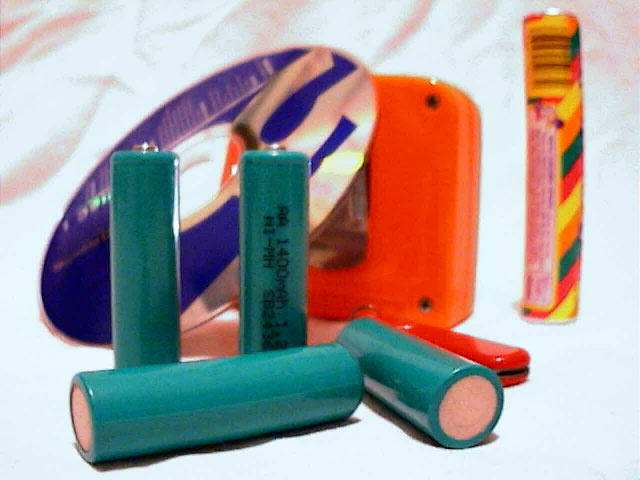
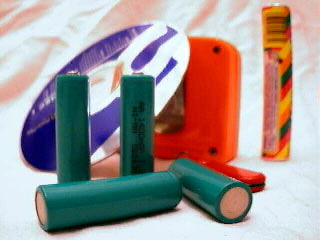
One day, I'm going to run out of new brightly coloured objects for test pictures. Not today, though.
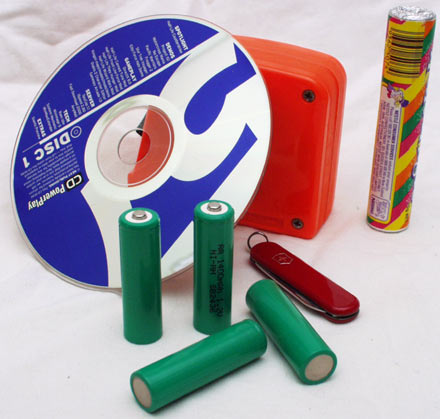
Here's a selection of random colourful things, photographed with my Olympus C-2500L digital camera (reviewed here). The 2500L now wears an expensive FL-40 flash, which I can point at the white ceiling when I want to take minimal-shadow pictures like this one.
A hair-searing external flash like the FL-40 gives you an easy way to use a low-sensitivity digital image sensor for night-time photography. Webcams don't have a flash, though, and are often used in a room with a normal indoor lighting level - say, one hundred watt incandescent globe in a ceiling fitting.
Many digicams can give you a pretty bright result in conditions like this, but they do it by cranking up the gain until the picture's very crunchy looking. It's good enough for video-phone purposes, but artistically brilliant it ain't. If you want a nice picture, you need considerably more light.
Accordingly, I tested the two Vcam cameras with low light and with high light. Low light was one hundred watt globe hanging from the ceiling, high light was the same globe in the ceiling fitting, plus another one, and a 500 watt halogen flood, with the two extra lights both pointed up at the white ceiling.
Starting with the 68R, here's what it made of the test scene in the low light test.

Click the image above for the full-resolution 320 by 240 version.
It's a bit washed out and a bit grainy, but good for a cheap camera. I've seen plenty worse.
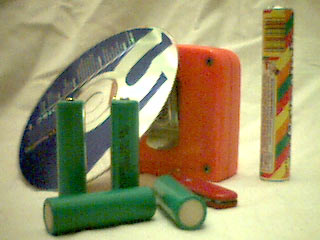
With more light, the result is noticeably better. Better colour saturation, less noise. Still hardly a world-class result, but this thing isn't priced like a world-class camera.
Just out of interest, I boosted the resolution to 640 by 480, still with the extra lights on. If you think this looks much the same as the 320 by 240 shot, you're exactly right. Click it for the full-resolution image, and you'll see interpolation in all its glory. Fuzzy fuzzy fuzzy.
Off with the extra lights, and on to the 99A.

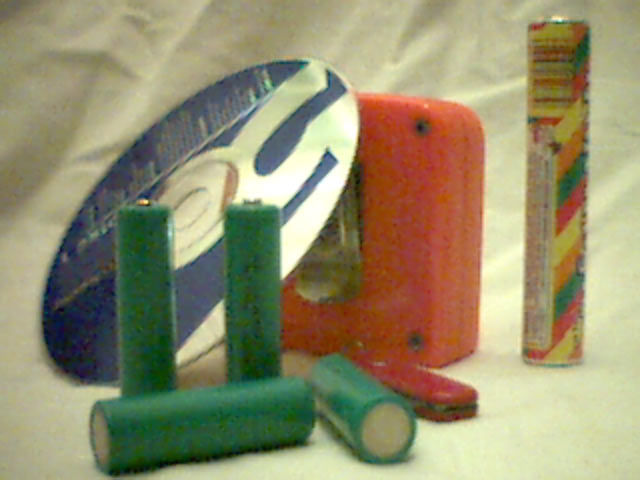
Here's the 99A's result in low light, 320 by 240 resolution. Good saturation, good tone balance, not much noise. Nice.
You'll note that the AA cells in the foreground are in sharp focus, but the stuff in the background is blurred. That's because the 99A has a rather wider field of view than the 68R, so I had to move it quite close to the test scene in order to fill the whole field of view. This exaggerates the small depth of field of the small-aperture lens.
The 68R has better depth of field than the 99A, so if you want to be able to get stuff at varying ranges decently in focus without fooling around, the 68R will do a better job. But if you want to get a whole room in shot, you want a wider field of view. Swings and roundabouts.
To show you the difference, here's the 68R's field of view when it's at the same range from the test scene as the 99A, above:
And now, on with the 99A shots.
This is the 99A's 640 by 480 result in low light (again, click for the full thing). The sensor certainly seems to have real 640 by 480 capability (which is more than some cameras that claim that resolution can actually manage...), and there are no weird quality changes when you switch resolutions.
OK. On with the other lights.
99A, high light, 320 by 240. The grain's almost gone now, but the camera's dynamic range can't quite seem to handle the light intensity spread from the shadows under the cells in the foreground (which are properly black) to the surface of the shiny CD (which is overexposed). The CD isn't reflecting the light directly; it's just reflecting the brightly lit ceiling.
Still, this is a good-looking shot overall.

The same again, in 640 by 480. With a bit less light, this camera would be happier. Which is a very good thing indeed - it means you can use the 99A for video conferencing and other purposes without having to point a table lamp at yourself to remove that distinctive webcam image-intensifier look.
Quality improvement
If you want decent image quality from a webcam, you have to fool with its output. Both of these cameras have drivers that let you fiddle with contrast and brightness and gamma and white balance - which is just as well, as the auto settings for both cameras can get very puzzled when looking at some subjects. But webcam owners who want to take still pictures of things often end up becoming more familiar with image processing software than they'd like to be.
To get a still shot out of a $AU150 camera that looks vaguely like something from a half-decent dedicated digital still camera, you commonly need to use a mild noise reduction filter, play with the levels, tweak up the colour saturation, and do a little sharpen.
It'd be nice if you could automate this a bit.
Happily, it turns out that you can.
When you point a webcam at a static scene, you may have noticed that the video coming out of it does not look like one still frame. Even after any automatic adjustment features have settled onto the white balance and gain settings they think are appropriate, every frame will be noticeably different from the last one. With lots of light, you can minimise the noise, because then the gain doesn't have to be set high. But you can't get it down below the level of noticeability.
The noise you see jittering up the picture comes from changes in the behaviour of the imaging system over time. Different spots on the image sensor report slightly different numbers each time they're polled, and the more gain's being used, the bigger a change in the final image each of those little changes creates.
And then there's the less obvious distortion caused by the inherent non-linearity of the sensor. This becomes more obvious at high gain in a dark scene, but it's always there in cheap sensors running at room temperature; some pixels are just brighter than others, in one, two, or all three primary colours.
You can compensate for both of these problems. Dynamic noise can be reduced by taking a series of frames and, essentially, averaging them out. If you're shooting motion video then this won't work; you'll just blur it to death. But if the only thing moving is the noise, then the more frames you average, the less noise you'll see.
To reduce static sensor non-linearity, you take a "dark field" shot - canonically, that's the inside of the lens cap. Or you can take a "flat field" shot - a picture of an even-toned thing of the same brightness as the real scene. From these, you can figure where the garbage is.
You can just subtract a dark field image from a real picture with the same exposure settings; flat field compensation needs more involved maths.
You can do all of this stuff by hand in an imaging program, using blend operators. Which is more than slightly tedious.
Alternatively, you can use software made specifically for the purpose. And the other day, when I was checking out Astronomy Picture of the Day, I found just that software.
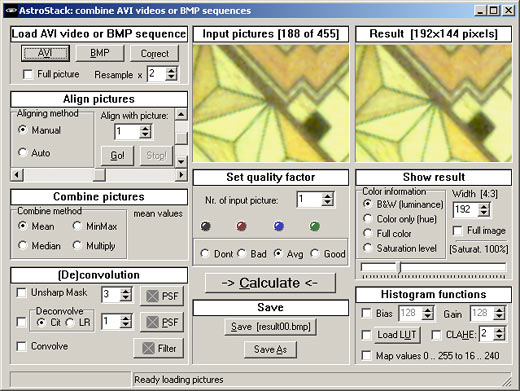
AstroStack is a freeware Windows application made to allow amateur astronomers to use cheap low-resolution PC-type cameras to do astrophotography.
Normally, the high noise of PC cameras makes them unsuitable for getting pictures of even quite bright celestial objects, but AstroStack can take an AVI video or series of BMP still frames, and light or dark field images too if you've got them, chew on 'em in a variety of quite configurable ways, and then spit out a surprisingly good looking image.
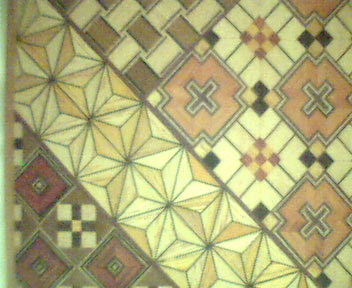
Example. Here's a normal still shot, from the CU-68R, of the marquetry on the side of a Japanese puzzle box (click for the full 352 by 288 image). It's a low light shot, and the result is grainy and washed out and uninspiring, as you'd expect.
I shot 180 frames of video of the puzzle box and fed it to AstroStack, telling it to spit out a 384 by 288 result, which is the closest resolution it can manage to the 352 by 288 original.
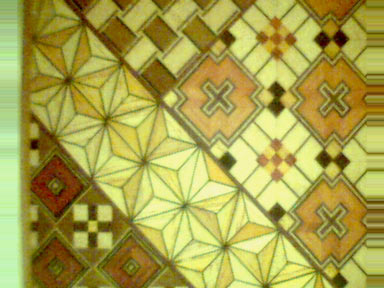
And here's the result. Richer colour, less noise, more detail - you can see a bit of wood grain that was hidden by the noise before. It's not a miracle, but it's not half bad. The resolution disparity's produced some artifacts on either side, but they're easy enough to crop off.
AstroStack isn't perfectly suited to everyday image manipulation. It's got a limited set of resolutions that top out at 640 by 480, its setup options are a tad obscure, and I couldn't make it work with a series of BMPs to save myself. But heck, it's a free download. You might as well try it.
Software
The two Vcams come with their own software, of course. It's a pretty good selection, too.
The only thing you have to install is the plain driver, which isn't covered in the main setup program for either camera. Both cameras come with driver software for Windows 98 and 2000, and Mac OS 8.6 and 9.0.
To install the basic driver in Windows, you just plug the camera in, then point Windows to the CD when it asks where the driver is. The rest of the stuff can be installed separately as well; the main setup program gives you a list and lets you pick what you want and what you don't.
Both cameras come with Microsoft's NetMeeting, which is free from Microsoft and so not a big selling point. You also get a trialware version of Prescient Systems' "GOTCHA!" security camera software, which will only run for 30 minutes at a time. Again - woohoo.
The rest of the package is better.
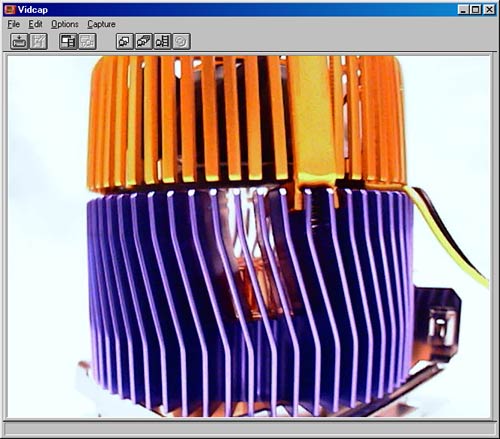
Both cameras come with this basic Vidcap program for when you just want a simple video file, or still frame, without any fuss. The only still format it understands is Microsoft's obscure Device Independent Bitmap (DIB), though, which makes it a bit of a dud.

Fortunately, there's also the nicer-looking LiveSnap for still capture, and Live Express for video capture.
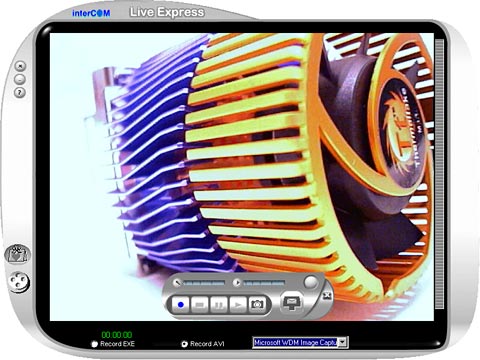
Live Express can do highly compressed AVI files (which can be parcelled up as executables) for e-mailing to people, but it can also grab video with low compression.
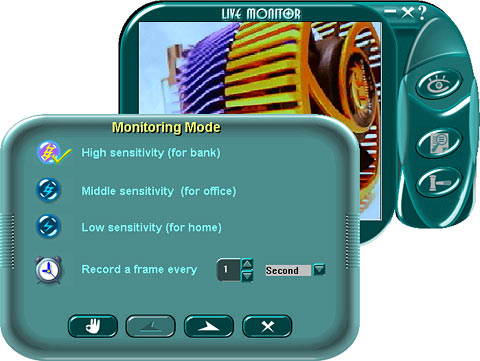
If you want basic security camera features, you needn't pay money for GOTCHA!; Live Monitor is also included, and is adequate.
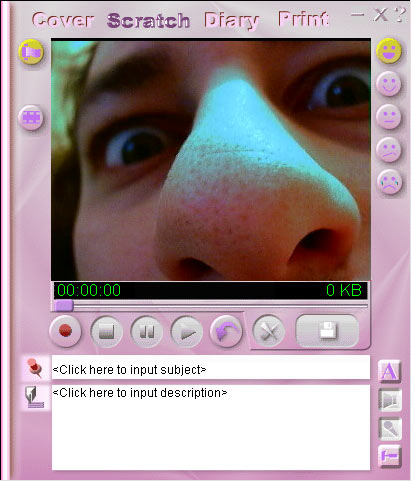
If you're in a My Little Pony sort of mood, there's also this Live Diary video-diary program, about which I carefully learned as little as possible, lest I develop diabetes from the sheer pinkness of it all.
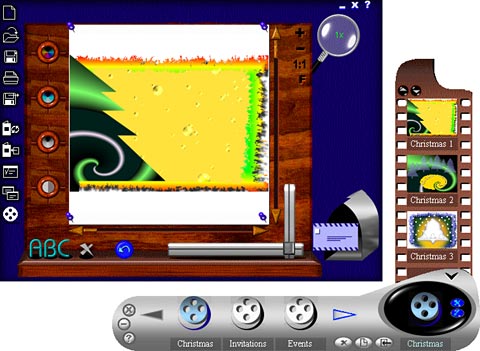
There's CardMaker, a stand-alone cute-and-friendly greeting card creator, and it's dovetailed pretty closely with a basic photo album package.
The CU-68R also comes with Ulead's iPhoto Express v1.1, a somewhat superannuated version of this Print Shop-ish package that lets you put grabbed images onto calendars, business or greeting cards, and that sort of thing.
Overall
The CU-68R is quite good, for the money. It impressed me more than Logitech cameras for the same price (check out the review here). Its image quality is OK, it doesn't stink in low light, it's easy enough to use, and the software bundle's not awful. If you're in the market for a webcam around this price point ($AU99 is about $US50, but US pricing is likely to be lower), then there's nothing wrong with the 68R.
The CU-99A, on the other hand, has really excellent image quality, by webcam standards, and a good price. OK, there's no built-in microphone, but mikes are cheap enough and you can just plug one into your sound card; no drama. For the money, the CU-99A is a very good camera.

