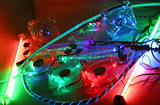
Four blue lights
Review date: 26 June 2002.Last modified 03-Dec-2011.
Case modding is no longer just for theatre-defraggers. Anybody can do it, these days. You can buy a PC case with two windows and a light right off the shelf.
Never mind whether this is sensible or not. It isn't, of course. It'd take considerable ingenuity to come up with even a weak argument in defence of making a PC that looks as if you've got tiny Zeta Reticulans imprisoned inside it. "It helps me avoid tauntage at LAN parties" is about as good as you're going to get.
But who cares. Having a glowing PC is fun. So let's get down to the important business of the actual things to make it glow.
I've looked at a few computer-illumination products before. The Gamerz Stuff LED-illuminated Badge Lite, for instance. And my do-it-yourself LED case light. And fluorescent tube kits from pcMods and CaseETC before that.
What all the cool kids are using these days, though, are cold cathode fluorescent lights, and electroluminescent (EL) products. So I rounded a few up.
First, another glowy badge.
CoolPC EL Case Badge Kit
CoolPC.com.au sell a selection of case modding gear, and this is their entry in the not-terribly-hotly-contested glowing case badge market.
The Badge Lite I checked out before has the advantage that its LED runs from standard power-supply low voltage via a simple resistor, and its simple centre-lit design gives it a graduated glow which I rather liked. And the kit only costs $US11.95 from Gamerz Stuff.
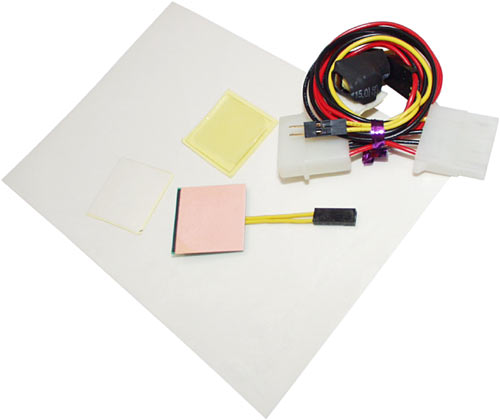
This badge light kit, on the other hand, costs $AU29 from CoolPC. So there's nothing much in it price-wise for Aussies, once you take shipping costs into account. You get a decent selection of stuff with the CoolPC kit, as well.
First up, there's the actual badge-lamp itself, of course. It looks pink when it's powered down...
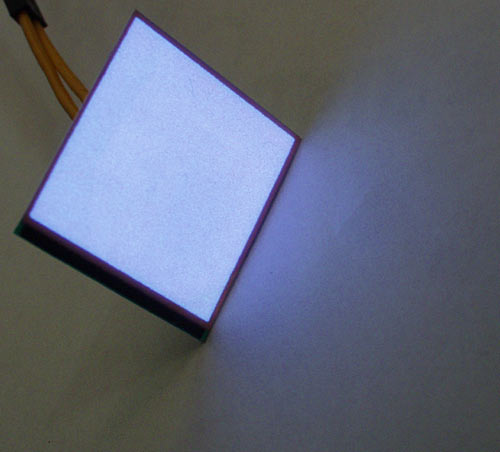
...but lights up powder-blue, and reasonably bright too. Thanks to its paler colour, it's more noticeable than the darker blue LED Badge Lite.
To make the EL badge light up, you connect it via a simple two-pin plug to a tiny inverter, which comes pre-wired to a passthrough four pin PSU connector. EL material runs from fairly high voltage AC, so it needs a little power supply widget in order to work from your PSU.
You can hook the lamp up either way around; AC doesn't care. This particular inverter delivers about 160 volts AC to the little inch-square lamp, but you're in no danger of electric shock from the thing - the current draw of the inverter from five volts (that's the PSU rail it connects to with its standard plug) is only about 29 milliamps (mA).
So even if the inverter's very high efficiency, it's good for less than a milliamp at 160V. Experiment with alligator clips and stabbing yourself with pins and you might, just possibly, be able to use this inverter to stop your heart. Or at least cause yourself a lot of pain.
So don't do that.
Along with the electrical bits, the CoolPC kit gives you an A6-sized piece of self adhesive clear vinyl badge-printing material for people who want to make their own badges on an ink jet printer, rather than just stick some pre-made badge onto the light. You also get a stick-on clear "Polydome" for the front of a home-made badge (six more Polydomes with matching printable sticky squares will set you back another $AU8), and a double-sided tape square for easy mounting of the badge on your PC front panel, or wherever else you want it to be. You just cut a hole for the badge's wire and stick the thing in place.
I decided to install the EL badge on a Lian Li case's 5.25 inch bay cover, rather than in the actual front panel badge spot; this is what I did with the previous Badge Lite as well. It's a handy way to make the things removable, not to mention make it possible to put them right next to each other for comparison purposes. Installing the badge on an aluminium bay cover required me to pay a bit more attention to electrical insulation than you'll have to if you use a plastic panel from a normal case.
Before installation, though, I needed a natty badge design.
This Symbol Of Evil copyright (c) Lucasfilm Limited, all rights reserved, click the picture if you want a nice 400 by 400 pixel version suitable for printing in the standard badge size of one by one inch.
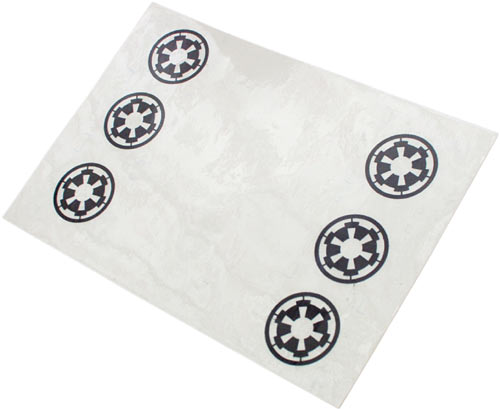
With a bit of jockeying around and playing with the printer settings (and repeated re-loading of the little A6 sheet), I managed to get a good printout of the badge that didn't lie over any imperfections in the sheet, and wasn't stripey like my last attempt. There were still plenty of opportunities to get something horribly wrong, of course.
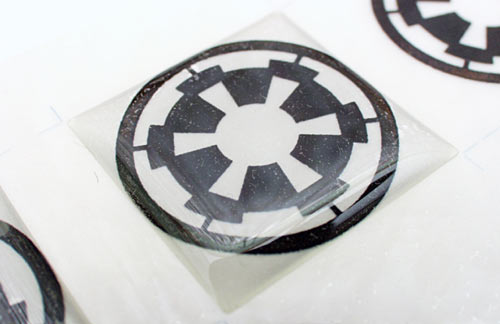
One Polydome, stuck over the best of the prints, with disturbing accuracy. Sticking the Polydome on straight without getting any air bubbles under it is easier said than done, but I pretty much managed it. And then I even managed to cut the darn thing out accurately.
On to the metalwork. No big deal, here; find middle of bay cover, centre punch it, drill it...
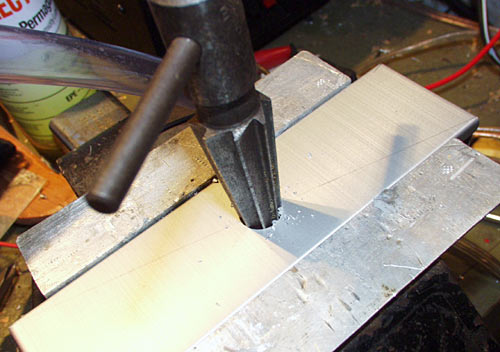
...then assault it with the tapered reamer until the hole's the right size, or at least not too much bigger than it should be.
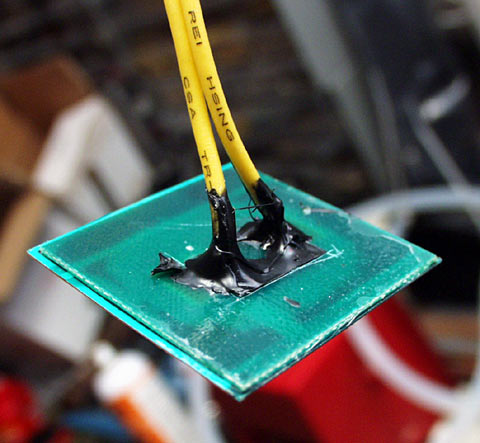
To avoid any nasty shorting-out problems - which might affect the computer's reliability, but would be more likely to damage the tiny inverter, eventually - I painted liquid electrical tape over every exposed high voltage contact on the light's electrics.

With that done, it was just a matter of sticking everything together. I used a couple of bits of double sided tape to stick the inverter into the corner of the bay cover.
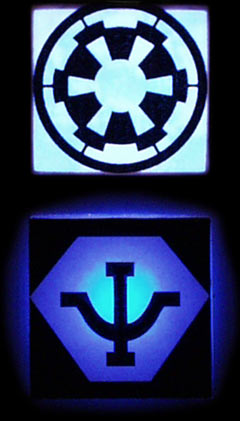
Here are the two badges glowing next to each other. Yes, I know I stuck the Empire symbol on sideways. Foo.
The two badges weren't actually quite this close, but I tweaked the picture for a better comparison. I haven't played with the lights' relative brightness, though; the EL badge is more noticeable than the LED-lit one.
Whether you actually want a more noticeable badge is another thing; the LED-lit badge actually serves as a perfectly OK night-light by itself, and is highly visible in a normally lit room, so it's questionable whether a brighter one is good for much. But if that's what you want, then here it is.
I like the EL badge kit, because it comes with more stuff than you get in the Badge Lite kit. But the actual EL badge itself doesn't thrill me. It's bright and it's evenly lit, but the one I got for review doesn't quite have EL material all the way to all four edges of the 1"x1" square; a little slice on one side is uncovered, and unlit. I also actually quite like the "hot middle" look of the LED-lit badge, so the even lighting of the EL material isn't a plus for me.
Life span might be an issue, too. EL material can last for several years of continuous operation, but it's apparently likely to be significantly dimmer after only about six straight months (which may of course mean a lot more than six months of computer use, depending on how often you turn the PC on). It depends on the quality of the material, and on how hard it's being driven.
I don't know how long this light will last, and I don't know how durable the little inverter is either. I do know that the LED Badge Lite is running at a low enough current that it ought to last for years and years of continuous service without losing noticeable brightness, though.
Realistically, I wouldn't be surprised if even a quite badly overdriven EL lamp still lasted until you decided to replace it with some fancier gadget (The Lava Lamp Badge!). And even if it's down to less than half brightness, it'll still be quite bright.
Aussies who want to buy themselves an EL badge kit can get one from CoolPC.
The big deal about EL material isn't that you can use it to light up badges, anyway. It's that you can get it in various shapes, and bend and cut it to suit your application. Enter: Lightstrips.
Tweakmonster Lightstrips
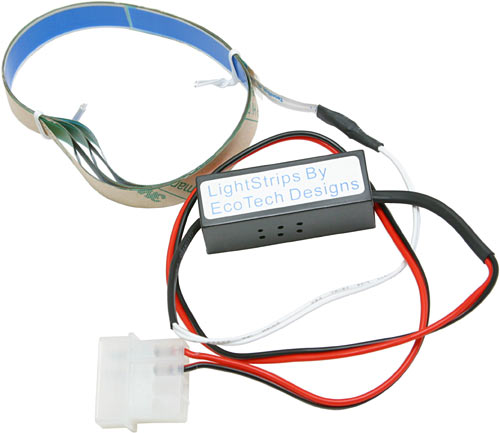
Tweakmonster, purveyors of goofy gear to the gentry, sell "Lightstrips" - self-adhesive electroluminescent tape.
Rigid fluorescent tubes can be difficult to fit in a case, and you certainly can't bend them around the curve of the front panel or the edge of the box. This stuff, on the other hand, can be attached pretty much anywhere you could stick tape; you just peel off its backing paper and press it in place. It can bend around sharp corners, too, though it might need a bit of encouragement from a hair-dryer. There are lots of interesting applications.
For about $US20, the Lightstrip kit gives you a generous 77cm or so (more than 30 inches) of EL tape, which lights up in one of five colours (blue, again, in this case), plus another little four-pin-plugged inverter box. There's no passthrough plug, this time; you'll need one spare four pin PSU plug.
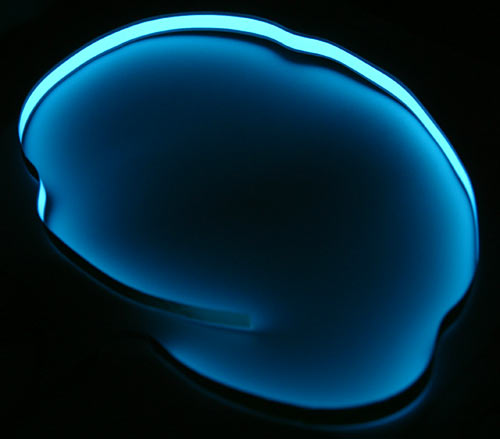
With a long enough exposure, the Lightstrip looks quite impressive. In ordinary room lighting, though, it really isn't. Per unit area, the Lightstrip lights up considerably dimmer than the CoolPC EL badge does.
This isn't entirely accounted for by the power numbers. The whole 77cm length of the Lightstrip, with a width of about 9mm (plus a small non-glowing border) and thus a total area of more than 69 square centimetres, consumes 85mA at 12 volts. So it's about a one watt device, with about 10.7 times the area of the 145 milliwatt CoolPC badge.
I don't know what the relative inverter efficiencies are, but if they're much the same, then the Lightstrip is running at about two thirds of the power per unit area of the CoolPC badge, and should thus be quite bright in comparison. But it isn't. If you want to light up the inside of your computer, a Lightstrip won't do much of a job of it.
Still, as an accent light for things that you don't want to light up brightly, the Lightstrip will work fine. And it is very easy to install; if you cut it to fit somewhere, the strip that remains ought to be brighter.
On the down side, you can't re-attach the cut off part - well, not if you're not a studied EL-stuff hacker, anyway.
For the money, I think this is an OK EL kit, and Tweakmonster have various dealers around the world, so it shouldn't be too hard to find it. If you don't want a PC you can read by, EL strips could be just what you're looking for.
What if you do want a PC that attracts light pollution complaints from local astronomers, though?
Then it's cold cathode time.
Blue neon

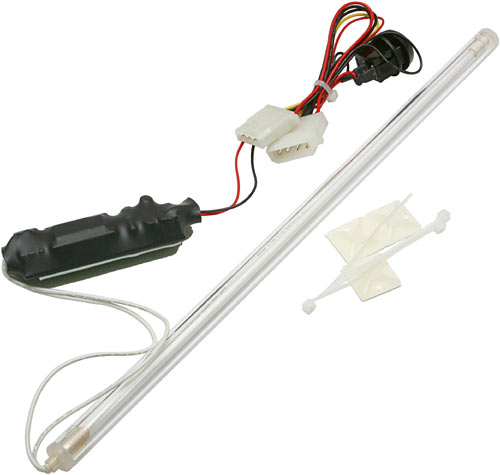
CoolPC's cold cathode light kit. Yours for $AU49, including more twiddly bits than you usually get with a cold cathode kit. Available in blue, green, red and UV; this one's blue, again.
This isn't actually a neon light, though many people call it that.
It also doesn't run cold, although it is a "cold cathode" light, which name has led many people to think that these things must be some sort of cross between a regular fluorescent tube and an LED, or something.
First up - if a gas discharge lamp isn't some shade of red, orange or pink then it's not filled with neon. Pretty much any other colour these days is likely to have the same mercury/argon filling as a household fluorescent lamp.
And as for the cold cathode thing - that just means that the electron-emitting cathode (negative terminal) inside the tube doesn't have to be heated above ambient to do its thing. Normal fluorescent lights have a small filament cathode, which runs at a dull red heat. The reason why these lamps don't turn on the moment you flick the switch is because the cathode has to warm up, before it'll start emitting electrons under low energy ion bombardment; getting the lamp past the warm-up stage reasonably quickly without damaging it is a big part of the fluoro-ballast-designer's art. Once the little cathode is hot, though, it's a very efficient source of electrons. This is part of the reason why fluorescent lighting is so efficient.
Cold cathode lamps have, compared with hot cathode designs, enormous metal cathodes, from which electrons are knocked by higher energy ions; the cathode doesn't have to be glowing to work.
On the plus side, this means cold cathode lamps have no warm-up delay. They turn on and off practically instantaneously, which makes them practical for applications like sound-triggered beat-following silliness. Cold cathode lights, assuming they're well made and not abused, also have a very good lifespan - much longer than regular "rapid start" fluorescent tubes.
On the minus side, cold cathode lamps aren't quite as efficient as normal fluorescent lights - the small ones used in PCs aren't likely to manage better than 30 lumens per watt (lpw), versus an easy 80 LPW for household fluoros.
The efficiency difference probably don't matter to you, though, because you're not lighting a city with a 30cm (12 inch) cold cathode light. You're lighting your PC. Or your bodacious car stereo install, or the forks-to-taillight chrome job on your stylin' motorcycle. Whatever. You want a decent amount of light, but not nearly as much as you get from your two-tube kitchen fluoro batten; a bit less efficiency means a bit more heat and a bit more power consumption for a given light level, but you're not going to be talking about a high enough overall power for it to matter.
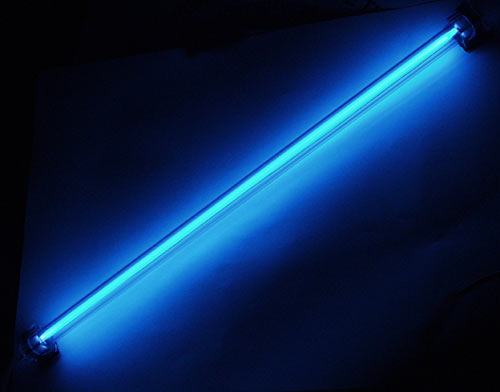
The CoolPC Cold cathode's inverter draws about 330mA from 12 volts; this rig is thus drawing the thick end of four watts. And it looks it, lousy cold cathode efficiency or no. The colour makes it hard to judge accurately, but this thing definitely outputs an amount of illumination comparable with that from a ten to twenty watt incandescent globe. One of these lamps per room would be adequate for an atmospheric party, and considerably better than the miserably dim painted incandescent globes that're often used for party lighting.
For a PC-illuminator, this thing is bright. Hard core PC enthusiasts whose computer hums away in their bedroom all night may need a blindfold if they want to get to sleep.
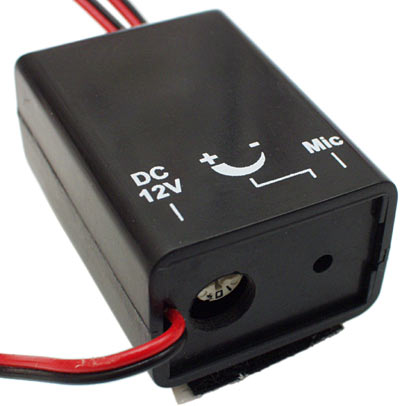
Along with the tube itself and its inverter, the CoolPC kit also gives you this little controller box. The box has a microphone in it, with a sensitivity potentiometer and a little switch on the back that lets you turn the tube off, or on constantly, or put it in sound-triggered mode. At maximum sensitivity, talking near the box is enough to make the tube flash.
If the box is inside a computer case then the audio-triggered mode is obviously not going to be good for much, but it wouldn't take too much ingenuity to get some use out of it.
The box also, by the way, has an output for a second inverter, if you want to sound-trigger two lights at once. You'll have to BYO second inverter and lamp, though.
Cold cathodes are a bit of a crapshoot. Some of 'em, like this one, are good. Some of 'em aren't. I know people who've managed to kill cold cathodes in a matter of hours, by just turning them on and off a few times; I presume lousy inverters were the culprit, but who knows. A whole lot of these things come out of China, and they're not all the same.
Some cold cathodes work, but only for suitably small values of "work".
Take this kit from Bitspower, for instance. On the face of it, it looks OK - neatly encapsulated tube with silicone rubber end caps, pre-wired switch, simple cable tie and self adhesive base mounting method.
It could use a bit more cable - there's about 68cm (27 inches) in total, but that includes the wires with the inverter and the switch in the middle of them, versus a total of almost 1.2 metres (almost four feet) of wire in the CoolPC kit. But the thing's still installable.
Trouble is, it's dim. Really dim.
From 12 volts, the Bitspower inverter draws only 120mA, at most; it's pulling little more than a third of the power of the CoolPC inverter, and it is as a result much dimmer than all of the decent cold cathodes I've seen. The CoolPC lamp might be a bit brighter than usual, but if it is, it's not by much. The Bitspower lamp's nowhere near the usual brightness.
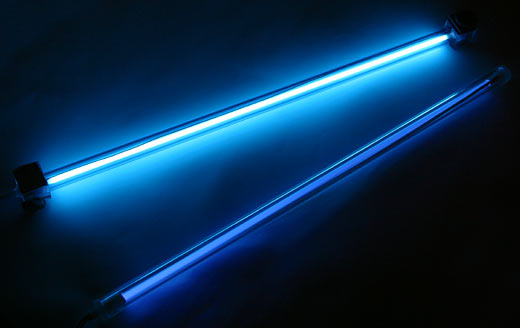
Here it is next to the CoolPC product. There's really no comparison.
If you want a subtle level of computer illumination, mind you, then a dim cold cathode may be just what you need. Maybe this thing'll have a 20 year lifespan as a result of its low drive power. And maybe I just got one with a dud inverter, or something.
On the subject of brightness comparisons - here's the Tweakmonster Lightstrip next to the CoolPC cold cathode.
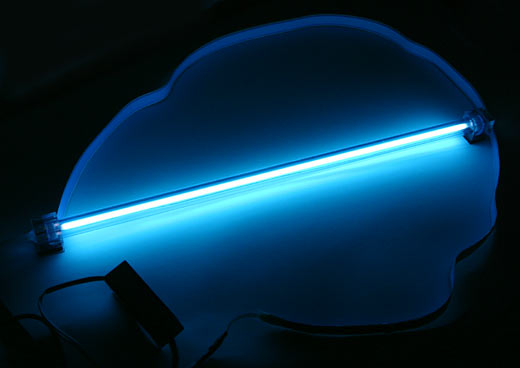
The brightness difference here is even larger - it's so large that the Lightstrip looks as if it's just reflecting light from the fluorescent tube. And, actually, that's not far from the truth. The Lightstrip didn't actually look a whole lot dimmer when I turned it off, leaving the cold cathode on.
Overall
Electroluminescent things are good for accent lighting; cold cathode fluoros are good if you want to really illuminate something. LEDs fall in between; the one-watt-plus Luxeon Star LEDs from Lumileds are definitely edging up into cold cathode territory, but they're not quite there yet, and to my knowledge nobody makes a lighting kit that uses them yet.
But all EL gear is not the same, and neither are all cold cathodes. Caveat emptor.
EL Case Badge Kit and cold cathode light kit kindly provided by CoolPC.com.au.
Lightstrip kindly provided by Tweakmonster.
Second cold cathode light kit kindly provided by Bitspower.

